
Facebook Ads are a great way to promote your business or brand, promote your products, get conversions, generate leads, or drive traffic to your website. I think most of you have probably heard of Facebook Ads but may not have actually tried them. That’s why we published a post introducing Facebook Ads some time ago.
In that article, we learned exactly what it is and what its benefits are. But in today’s article, we’ll explore how to actually use it to your advantage. In other words, today I’ll show you how to create an example Facebook ad campaign.
What is Facebook Campaign?
A unit of procedure used to advertise on Facebook is called a campaign.
You can understand it this way: suppose your company has launched a new product and you’ve been given the responsibility to promote it. So, if you want to advertise on Facebook, you’ll create an ad campaign and define the number of days you want to promote it.
When we carry out this advertising process within a limited period of time, it is called an ad campaign.
Facebook has created a very good and user-friendly Ads Manager platform for advertisers, so that even a beginner can easily create and publish ads.
So, I’m assuming that you’re new to the digital marketing or online advertising field and want to know how to create ads on Facebook. So, let’s get started.
Step by Step Guide to Create an Ad Campaign on Facebook
First, log in to your Facebook account. Then, go to your account’s dropdown menu. There, you’ll find several options, including the Create Ads and Manage Ads options. To create a new ad campaign, click the Create Ads option.
If you’re clicking this option for the first time, it will give you a brief introduction and prompt you to create a new Facebook Ads account. Simply create your account by giving it any name and clicking the Create button. Facebook’s interactive and dynamic interface will guide you through each step.
You’ll see an “i” symbol next to each option in the Facebook ads interface. You can learn more about that option by hovering over it. Essentially, it’s a helpful guiding option.
After this, the main page for Facebook Ads Creation will open, offering a variety of ad campaign types. You can choose any ad campaign type that suits you best.
Different types will help you with different types of promotions. If you just want to popularize your brand, you can choose Brand Awareness; if you need traffic to your website, you can choose Traffic; if you want conversions, you can choose Conversions or Catalog Sales. There are many other considerations given, from which you can choose any one; it totally depends on what your requirements are.
There are 4 major phases to creating any Facebook ad campaign:
Selecting a Marketing Objective
Creating an Ad Set
Creating an Ad
Submitting for Review
Any type of Facebook ad campaign has four steps. Each step has many further options. These options vary depending on the marketing objectives and considerations you choose in the first step.
While it’s impossible to explain every single option in this article, the list of options for all marketing objectives would be overwhelming. Therefore, in this article, I’ve provided a brief introduction to each phase, enabling you to create and configure your own ad campaign.
Choosing a Marketing Objective
As I mentioned earlier, once you create your account in the Create Ads section, this will be the first step you take when you visit this section again, and you’ll need to select your marketing objectives, such as Brand Awareness, Lead Generation, Conversions, etc.
Below is a screenshot of all the Marketing Objectives currently available on Facebook:
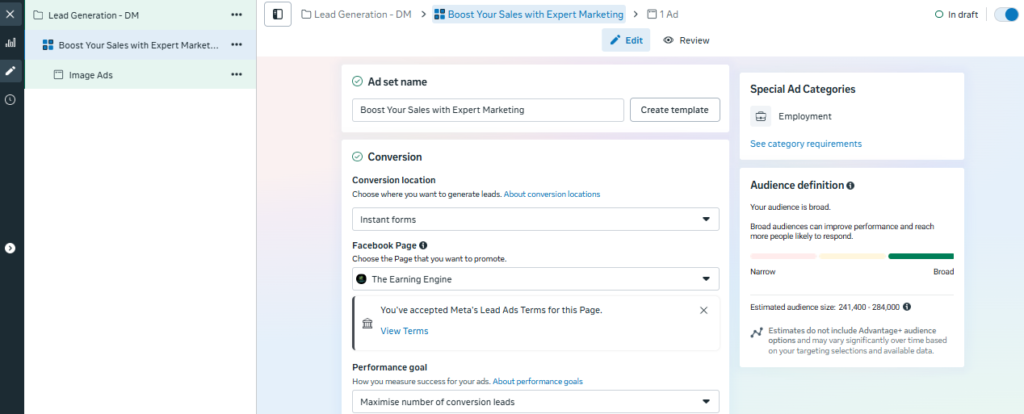
Creating an Ad Set
In an Ad Set, we essentially define the ad campaign’s limits, audience, interests, budget, and placements. First, you give the Ad Set a name and then select its audience. This audience is chosen based on the location within which you want your ad to appear, such as Janakpuri, Delhi, or the entire country, or a city.
Similarly, you need to set interests so that Facebook shows your ad only to people who are interested in the things you define.
Whatever audience and interest you choose, Facebook will also calculate and tell you the minimum and maximum number of people you can reach with your ad. Basically, it gives you estimated results.
After this, you need to define where Facebook should show your ads, such as on Instagram, Facebook Desktop Version, Mobile Version, etc.
I recommend leaving it on Automatic Placements if you’re a beginner. With this option, Facebook will automatically display ads for you in different locations.
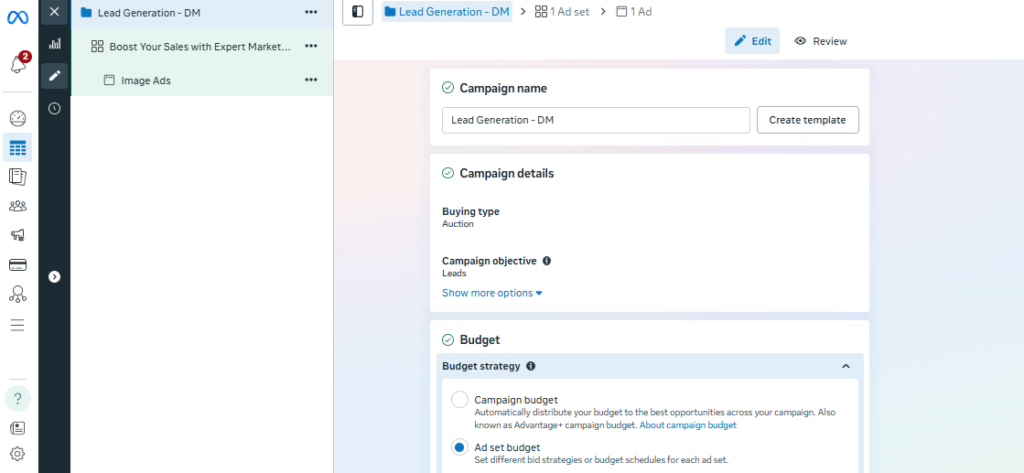
After this, you need to set your budget for how much you want to spend on this particular ad campaign. If you’re running ads across two or more days, you’ll need to enter your daily budget, or you can also set it on a weekly basis.
Creating an Ad
In this option, you’ll need to create the ad itself. You can either create a new ad or select a post from one of your Facebook pages.
You must link a Facebook page to each ad type because Facebook displays your ads on behalf of your Facebook page. This means that each ad will have the name of your linked Facebook page.
After this, you have to choose the format of the Ad and according to that format, upload images and videos etc. to complete the ad. Facebook gives you many ad format options like Full-ScreenExperience, Carousel, Multiple Images, Single Image, Single Video, Combination of All Formats type etc.
After this, you have to ad Call To Action button or proper links etc. These options totally depend on your marketing objectives and are different. Next to each option, there are further advanced options so that you can run your ad campaign in a highly customized manner.
Submitting for Review
Once you’ve completely created both the AdSet and the Ad, you must submit your ad for Facebook’s review phase. Then, you’ll need to wait for approval. Sometimes approval is received within a few minutes, and sometimes it can take a few hours.
Once you receive approval, your ad runs as scheduled, and upon completion, you’ll see the results in your Ads Manager. You can export the results from Ads Manager in Excel or CSV format.
I’ve run different campaigns from my Ad account, the results of which you can see below.
When you create your first ad campaign, it prompts you to add the budget amount to your account in the last step, and also asks for your desired currency during account creation.
You must first add the required amount to your account to run your campaign. You can add funds at any time by going to Payment Settings. Facebook offers card, net banking, and PayTM payment options.
I hope this article has provided you with enough information to create and run a Facebook ad campaign!
Special Note
If you’re looking to expand your business’s online presence and reach more customers, we can help. We work to rapidly grow your business through digital marketing, SEO, and online growth strategies.
For more information, contact us: theearningengine1@gmail.com